Have an emergency? Call us now on 07732 234231. Available 24/7 with a 30 minute response time.

Heat pumps are rapidly changing how homes in Britain stay warm and efficient. It is surprising just how much difference simple preparation makes and professional installers strongly recommend that wall insulation should have U values below 0.3 W per square metre Kelvin for best results. Most people think picking any heat pump is enough but the real secret is that getting the right model, the right installation and even a 300mm clearance around your outdoor unit can make or break your comfort and energy bills.
| Key Point | Explanation |
|---|---|
| 1. Accurate assessment is crucial | Evaluate your home’s heating needs and insulation quality to choose the right heat pump. |
| 2. Select the right heat pump type | Assess air source versus ground source heat pumps based on space and energy efficiency needs. |
| 3. Prepare the installation area properly | Ensure a clear, stable location with verified electrical compatibility and all required tools ready. |
| 4. Follow installation guidelines precisely | Mount units correctly and connect refrigerant lines while minimizing bends for optimal performance. |
| 5. Conduct thorough system testing | Test for proper operation, refrigerant charge, and efficiency across various conditions before use. |
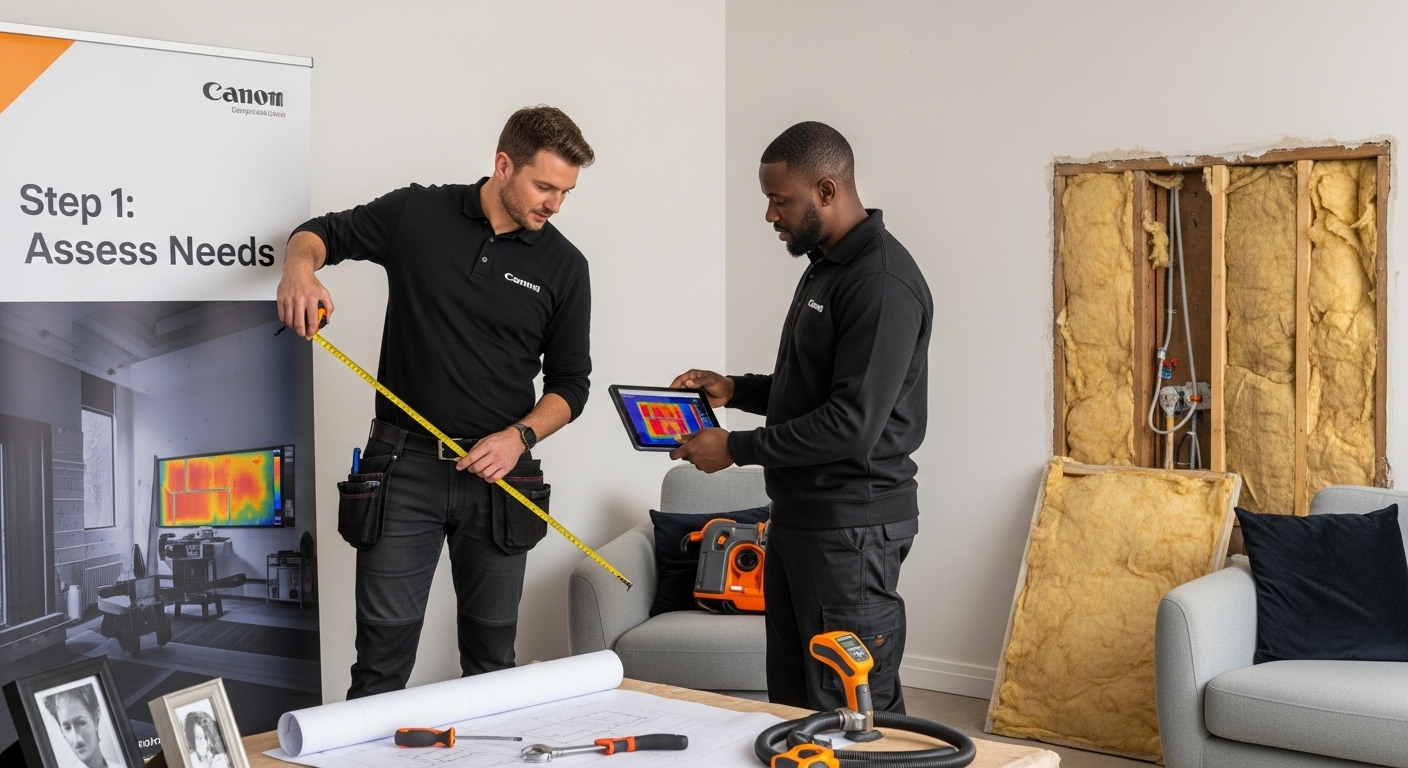
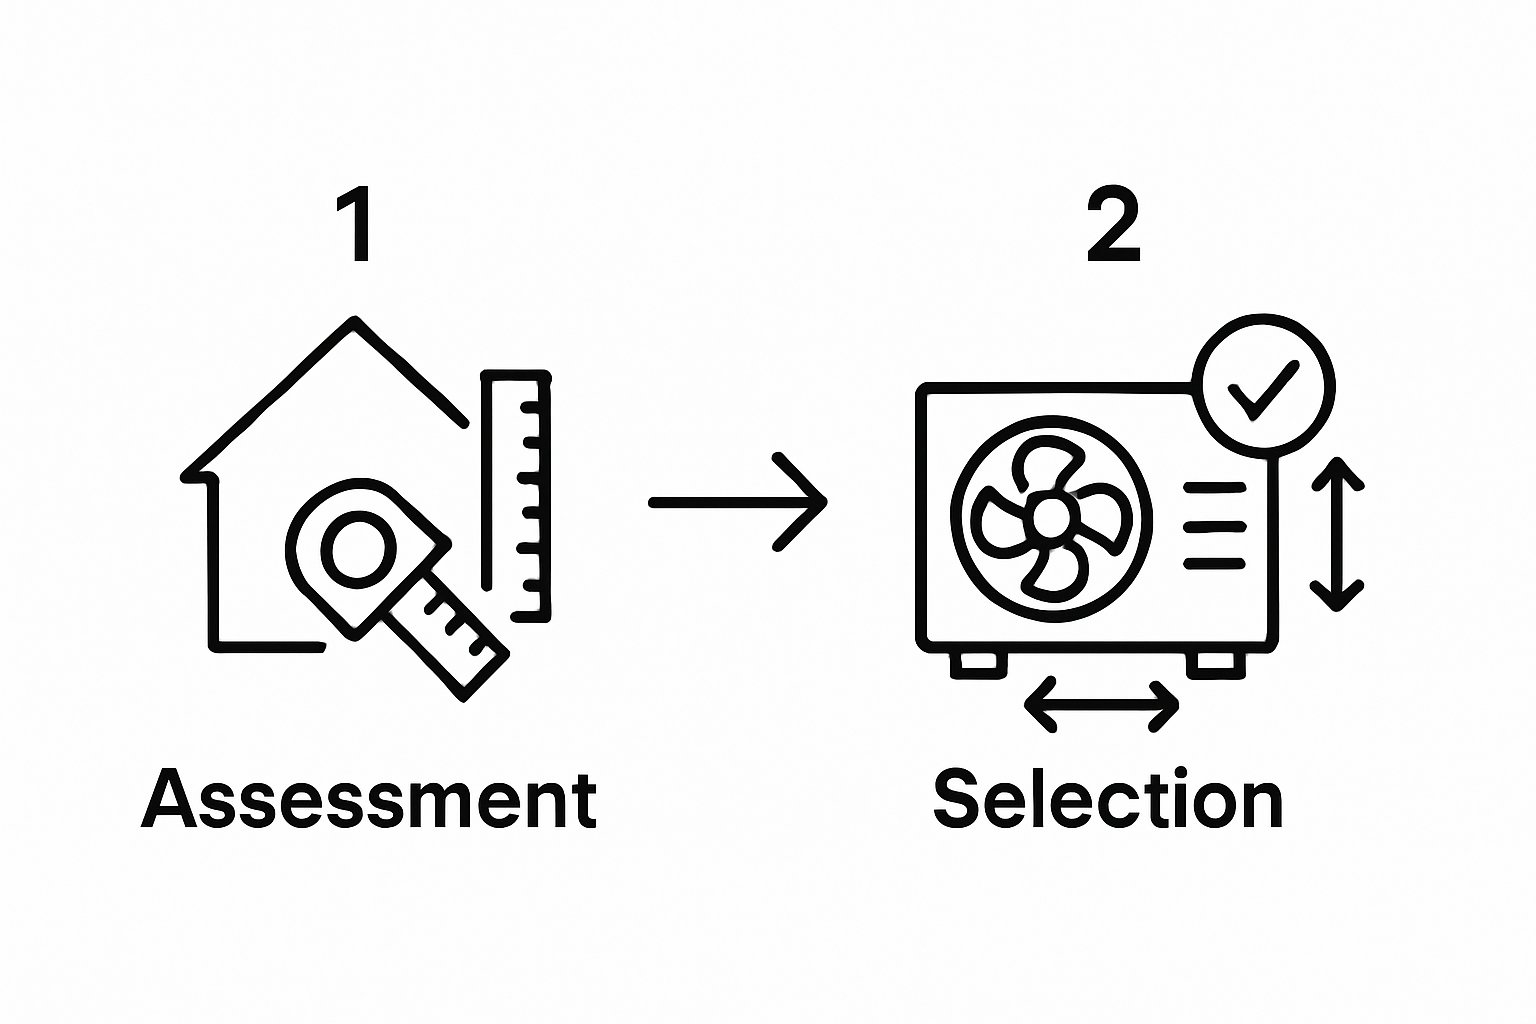
Successful heat pump installation begins with a comprehensive assessment of your home’s specific heating requirements and spatial configurations. This initial step determines the efficiency, performance, and long term comfort of your heating system. Understanding your property’s unique characteristics helps select the most appropriate heat pump technology and sizing.
Start by conducting a thorough evaluation of your property’s thermal envelope. Examine your home’s insulation quality, as this critically impacts heat pump performance. Poorly insulated properties will require additional investment in upgrading wall, roof, and floor insulation to maximise the system’s effectiveness. Professional heating engineers recommend achieving a minimum standard of wall insulation with U values below 0.3 W/m2K to support optimal heat pump functionality.
Carefully measure and document your property’s total floor area, ceiling heights, and room layouts. These dimensions directly influence the heat pump’s required capacity and placement. Learn more about our heating solutions for your home to understand how different property configurations impact heating system selection. Pay particular attention to areas with higher heat loss such as large windows, external walls, and rooms with minimal solar exposure.
Consider your household’s specific heating patterns and requirements. Assess the number of occupants, typical temperature preferences, and daily heating usage. Some households might require more consistent heating, while others need intermittent warmth during specific times. These behavioural patterns significantly influence the heat pump’s ideal capacity and operational settings.
Key verification criteria for completing this assessment include:
By meticulously examining these factors, you establish a solid foundation for a successful heat pump installation that delivers efficient, tailored heating performance.
Here is a checklist table summarising the key verification criteria from each main heat pump installation step, helping homeowners ensure nothing is overlooked at each phase.
| Installation Step | Key Verification Criteria |
|---|---|
| Assess Needs & Space | Accurate property measurements; insulation evaluation; detailed heating requirements; professional consultation |
| Choose Heat Pump Model | Capacity matches property; COP above 3.0; infrastructure compatibility; professional recommendation |
| Prepare Installation Area | 300mm clearance around unit; electrical compatibility; toolkit ready; site measurements; installation location assessed |
| Install Units | Level/stable outdoor mount; precise refrigerant connections; secure indoor mounting; no visible leaks; alignment verified |
| Connect Electrical & Refrigerant Lines | Dedicated electrical circuit; precise routing; no atmospheric moisture; hermetic seals; insulation applied; pressure testing completed |
| Test System | Full system functionality; correct refrigerant charge; consistent output; no abnormal sounds; meets specifications; successful multi-mode operation |
Selecting the appropriate heat pump model represents a critical decision that directly impacts your home’s heating efficiency, energy consumption, and long term comfort. This step requires careful consideration of multiple technical and practical factors to ensure you invest in a system perfectly matched to your property’s unique requirements.
The primary decision involves choosing between air source and ground source heat pump technologies. Air source heat pumps extract warmth from outside air and work well in properties with moderate space constraints, while ground source systems require significant garden or ground area for underground pipework installation. Explore our comprehensive guide on heat pump solutions to understand the nuanced differences between these technologies.
Evaluate the heat pump’s coefficient of performance (COP), which indicates the system’s efficiency by measuring heat output against electrical energy consumed. Higher COP ratings suggest superior performance and lower running costs. Professional heating engineers recommend selecting models with a COP between 3.0 and 4.5 for optimal energy efficiency. Consider factors like local climate conditions, your property’s thermal characteristics, and existing infrastructure when making this selection.
Carefully assess the heat pump’s output capacity, which must precisely match your property’s heating demands. Undersized units will struggle to maintain comfortable temperatures, while oversized systems waste energy through frequent cycling. Consult a qualified heating professional who can perform detailed heat loss calculations specific to your home, taking into account insulation quality, room sizes, window configurations, and occupancy patterns.
This comparison table helps homeowners quickly understand the key differences between air source and ground source heat pumps, using details mentioned in the selection phase.
| Feature | Air Source Heat Pump | Ground Source Heat Pump |
|---|---|---|
| Heat Source | Outside air | Underground pipes (soil) |
| Space Requirements | Moderate | Significant garden or ground area |
| Typical Application | Properties with space constraints | Homes with extensive outdoor space |
| Installation Complexity | Generally less invasive | Requires extensive groundworks |
| Efficiency (COP) | 3.0 – 4.5 (recommended) | 3.0 – 4.5 (recommended) |
Verification criteria for selecting the right heat pump include:
By methodically evaluating these critical parameters, you will identify a heat pump system that delivers consistent, efficient heating tailored to your specific domestic environment.
Preparing the installation area represents a crucial phase that significantly influences the success and efficiency of your heat pump system. This preparatory step involves creating an optimal environment for equipment placement, ensuring proper access, ventilation, and structural support. Meticulous preparation minimises potential complications during the actual installation process.
Begin by identifying the most suitable external location for your heat pump unit. Select an area with adequate clearance from surrounding structures, allowing unrestricted airflow and minimising potential noise disruption. Recommended minimum clearance is at least 300mm around the unit to facilitate proper ventilation and maintenance access. Learn more about optimal heat pump placement to understand the technical considerations involved.
Evaluate your property’s electrical infrastructure to confirm it can support the heat pump’s power requirements. Modern heat pump systems typically demand a dedicated electrical circuit with appropriate amperage and voltage specifications. Consult a qualified electrician to assess your home’s electrical panel and potentially upgrade wiring or circuit breakers to accommodate the new heating system safely.
Gather the necessary tools and equipment before commencing installation. Professional installers recommend having a comprehensive toolkit that includes precision measuring instruments, level, drill with various bit sizes, adjustable wrench, pipe cutters, insulation materials, and personal protective equipment. Ensure all tools are in excellent condition and readily accessible to streamline the installation process.
To assist in smooth installation, this table outlines required tools, their purposes, and any special notes referenced in the preparation stage.
| Tool/Equipment | Purpose | Special Notes |
|---|---|---|
| Precision measuring tools | Measure property and installation area | Confirm dimensions and clearances |
| Level | Ensure both indoor and outdoor units are level | Vital for optimal performance |
| Drill with bit selection | Mounting units and creating fixings | Appropriate bit sizes for surfaces |
| Adjustable wrench | Securing bolts, nuts, and fittings | Must fit range of connection sizes |
| Pipe cutters | Cutting refrigerant and insulation piping | Use on high quality copper pipe |
| Insulation materials | Insulating refrigerant lines | Closed-cell foam recommended |
| Personal protective equipment | Installer safety (gloves, goggles etc) | Ensure compliance with standards |
Key preparation and verification criteria include:
Carefully documenting and addressing these preparatory elements creates a solid foundation for a smooth, efficient heat pump installation. Proper preparation reduces potential delays, minimises risk of complications, and supports the long term performance of your new heating system.
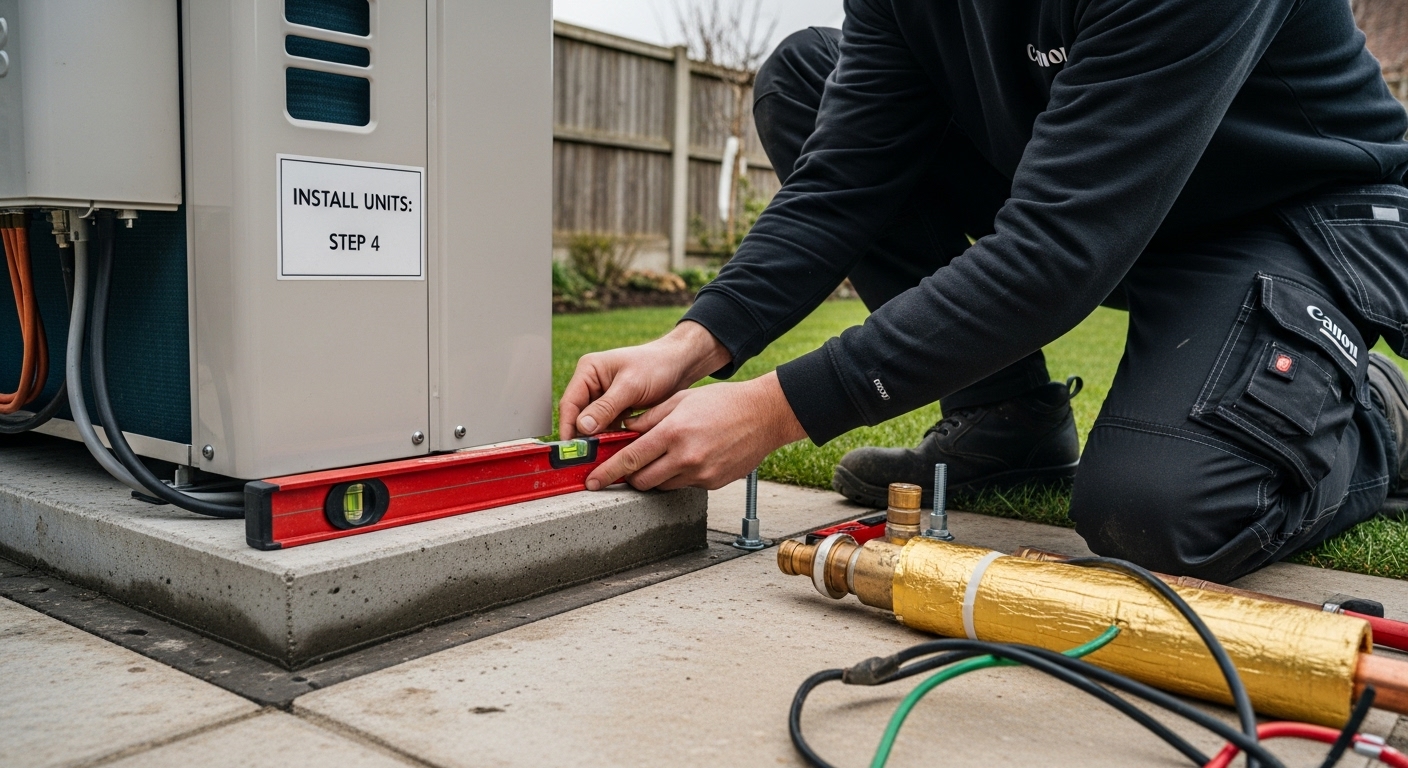
Installing the indoor and outdoor heat pump units requires precision, technical expertise, and careful attention to manufacturer specifications. This critical stage transforms your prepared installation area into a functional heating system that will provide efficient warmth for years to come. Learn about our professional heat pump installation services to understand the complexity of this process.
Begin by positioning the outdoor unit on a stable, level mounting surface. Professional installers recommend using a robust concrete or purpose-built mounting platform that provides excellent vibration absorption and prevents moisture accumulation. Ensure the unit is perfectly level using a professional spirit level, as even slight misalignments can impact system performance and longevity.
Carefully connect the refrigerant pipework between indoor and outdoor units, maintaining strict adherence to manufacturer guidelines regarding pipe length, diameter, and routing. Precise pipe installation is crucial for maintaining optimal heat transfer efficiency. Use high quality copper piping with appropriate insulation, making certain all connections are precisely sealed to prevent refrigerant leakage. Professional heating engineers typically employ specialised flaring tools to create secure, leak-free connections that can withstand significant temperature and pressure variations.
Mount the indoor unit in a strategic location that facilitates optimal heat distribution throughout your living space. Consider factors such as proximity to existing heating infrastructure, wall strength, and room layout. Maintain recommended clearance around the unit to ensure unobstructed airflow and simplify future maintenance access. Secure the unit using robust wall brackets designed to support its weight, ensuring a perfectly level and stable installation.
Key verification criteria for heat pump unit installation include:
Successful completion of this step sets the foundation for a high-performance heat pump system that will deliver efficient, consistent heating to your home.
Connecting electrical and refrigerant lines represents a highly technical phase of heat pump installation that demands precision, expertise, and strict adherence to safety protocols. This critical step ensures the seamless integration of your heat pump system’s electrical and thermal infrastructure. Explore our comprehensive heating system guidelines to appreciate the intricacies involved in this process.
Electrical connection requires meticulous planning and professional expertise. Before attempting any electrical work, confirm that the property’s main electrical supply can accommodate the heat pump’s specific power requirements. Utilise a dedicated circuit with appropriate amperage rating, typically between 20 to 50 amps depending on the system’s specifications. Professional electricians recommend installing a dedicated circuit breaker that precisely matches the heat pump’s electrical load to prevent potential overloads or system interruptions.
Refrigerant line installation demands exceptional care and specialist knowledge. Precision is paramount when routing and connecting refrigerant pipework between indoor and outdoor units. Use high-quality copper piping specifically designed for heat pump applications, ensuring minimal bends and optimal direct routing. Apply professional vacuum pumping techniques to remove all atmospheric moisture and air from the refrigerant lines before charging the system. This crucial step prevents potential performance degradation and reduces the risk of internal system corrosion.
Ensure all electrical and refrigerant connections are performed with manufacturer-approved techniques. Use specialised compression fittings designed to create hermetic seals that can withstand significant temperature and pressure variations. Apply appropriate thermal insulation to refrigerant lines to maintain optimal heat transfer efficiency and prevent energy loss. Professional installers typically use closed cell foam insulation with UV resistant outer coating to protect against environmental degradation.
Key verification criteria for electrical and refrigerant line connection include:
Successful completion of this step transforms your heat pump from a collection of components into a unified, operational heating system ready for final commissioning and performance testing.
System testing represents the critical final stage of heat pump installation, where theoretical design meets practical performance. This comprehensive evaluation determines whether your newly installed heating system operates at peak efficiency and meets the specific thermal requirements of your property. Understand the intricacies of heat pump performance testing to appreciate the depth of this essential process.
Initial functional testing begins with a systematic electrical and mechanical assessment. Professional technicians will methodically activate each component, monitoring startup sequences, checking electrical connections, and verifying that all control systems respond correctly. They will carefully observe the indoor and outdoor units during initial operation, listening for any unusual sounds that might indicate misalignment, loose components, or potential mechanical issues. This preliminary examination helps identify and address any immediate installation anomalies before comprehensive performance testing commences.
Refrigerant system evaluation requires precise measurement and expert interpretation. Technicians will use specialised manifold gauge sets to measure system pressures, comparing actual readings against manufacturer specifications. Precise refrigerant charge is crucial for optimal heat pump performance. Undercharged or overcharged systems can dramatically reduce efficiency, increase energy consumption, and potentially cause long-term component damage. Professional installers typically perform multiple pressure and temperature measurements across different operational modes to ensure comprehensive system validation.
Efficiency testing involves monitoring the heat pump’s performance across various operational conditions. Technicians will assess the system’s coefficient of performance (COP), which measures the ratio of heat output to electrical energy input. They will test the system under different external temperatures and internal heating demands, ensuring consistent performance and verifying that the heat pump can maintain designed thermal output across varying environmental conditions.
Key verification criteria for heat pump system testing include:
Successful completion of this testing phase confirms your heat pump is ready to provide efficient, reliable heating for your home.
After reading the essential steps to installing a heat pump, it is clear that every phase requires professional insight. From assessing insulation levels to correct refrigerant and electrical line connection, the process can quickly become overwhelming for homeowners who want efficient, reliable heating. Mistakes not only affect your comfort but can lead to wasted energy and expensive repairs. Why risk your investment or spend time worrying about technical compliance? Let certified local experts handle it for you and enjoy peace of mind from start to finish.

If you want your heat pump fitted to strict safety standards and tailored to your home’s individual needs, you deserve support from a team with over 18 years of trusted experience. Explore our heat pump installation expertise and see why residents in Hampshire, Portsmouth, and Waterlooville rely on us for their complete heating solutions. Visit skanheating.co.uk now or contact us directly for a free initial consultation. Make the smart move for your home’s comfort and save on energy—your perfect installation is just a click away.
Successful heat pump installation begins with a comprehensive assessment of your home’s specific heating needs and spatial configurations. Evaluating your property’s thermal envelope, insulation quality, and layout is crucial to determine the efficiency and performance of your heating system.
You can choose between air source and ground source heat pumps. Air source pumps extract warmth from the outside air and are suitable for properties with moderate space constraints, whereas ground source systems require significant garden or ground area for installation. Evaluate factors such as efficiency ratings, local climate, and your property’s characteristics to make an informed choice.
When preparing for installation, identify the most suitable external location for the outdoor unit, ensuring adequate clearance for airflow and maintenance access. Verify that your property’s electrical infrastructure can support the heat pump’s power requirements and gather all necessary tools and equipment for the installation.
After installation, conduct a thorough testing phase to monitor system performance. Check electrical connections, refrigerant pressures, and overall functionality. Efficiency testing will help ensure your heat pump is operating at optimal performance, maintaining designed thermal output across varying conditions.